
Due to an expired code sign certificate, the version of Screenconnect that is launched from Connectwise Automate (aka Labtech) fails to run on 2 of my Windows 10 machines but works fine on the rest of the machines. The error message “Your administrator has blocked this application because it potentially poses a security risk to your computer”. The ones that fail are running Windows 1809 and 1903 so I suspect that there is some of the new features of SmartScreen are enabled and older versions do not have these settings.
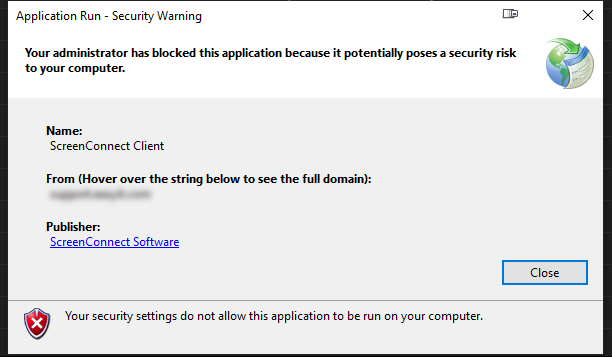
Checking out the file used for Screenconnect, I saw that the certificate used to sign the exe file expired on February 1st this year, but I’m not sure why my machines suddenly started to refuse to run it the last few days of March.
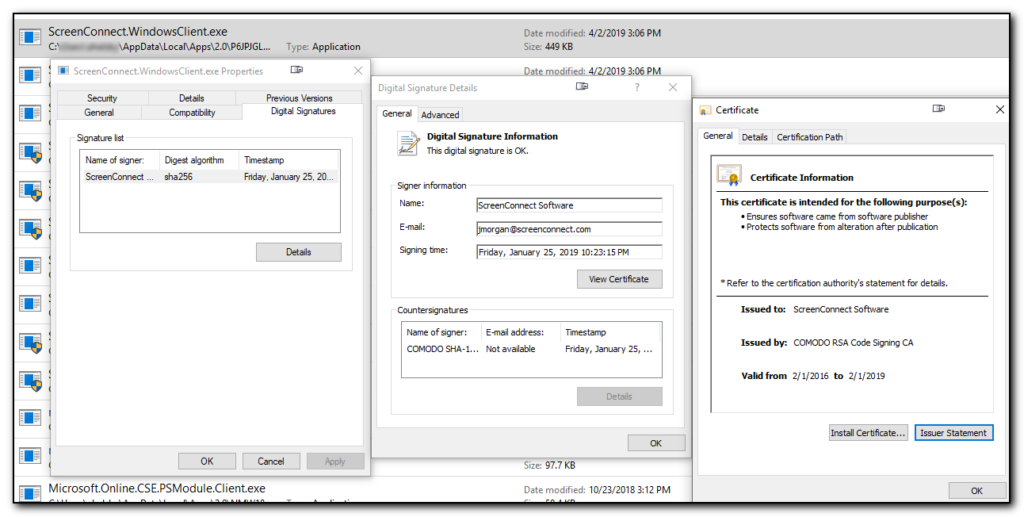
The Screenconnect.WindowsClient.exe is downloaded to a random subdirectory of appdata\local\apps\2.0 so I recommend you navigate to this directory and then search for *.exe and check the correct screenconnect file as per the screenshot below which shows the certificate expiring on the 1st February
After searching around and contacting Connectwise Support they advised me this would be fixed in an upcoming version. In the meantime setting the registry value HKEY_LOCAL_MACHINE\SOFTWARE\Microsoft.NETFramework\Security\TrustManager\PromptingLevel\Internet to a string type of Enabled will allow the ClickOnce application to popup and this allows the dialog box to give an option as to whether the file should be run or not (the previous setting was Disabled). This then allows the user to select yes to install and run the file overriding the invalid SSL certificate.
Obviously this is not a great idea but it does allow you to run Screenconnect from within the Automate window. (The other alternative is to use the Screenconnect website itself to connect).


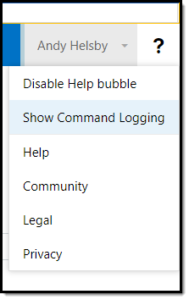 One of my annoyances with Office365 administration tasks was that I could make changes to the interface but had no idea what commands were being run behind the scenes. This made creating scripts a frustrating trial and error attempt at finding the correct verbs to run.