Both Brandi and I have had alerts in our cars come up to say that our tire pressures need to be checked. Unfortunately neither of the cars actually tell you *which* tire has the problem so it requires checking all 4 tires (which probably should be done anyway). Naturally the stations never have working air or pressure gauges and as I have an air compressor at home – I need a quick way of checking the pressures. I think this is actually caused by the temperature dropping and getting cold overnight as it only seemed to happen on the couple of cold nights we have had recently.
I already have one of those stick gauges – you put it on the valve stem and it shoots out a piece of plastic with marks to tell you the pressure and each tire came up with the right pressure give or take one psi so I wasn’t sure which tire had the problem.
I was given the chance to review the TravelSafer digital pressure gauge and due to the above issues I jumped at the chance to get a second opinion on the tire pressures.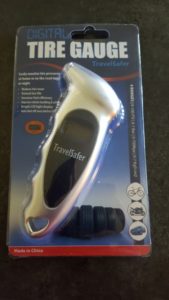
The gauge arrived in see through plastic on a cardboard backing (left) and was very easy to open which is a plus – no need to go and get scissors to open this. It requires a 3v (supplied) lithium battery, so the device was ready to use straight away. It does look like the screws that hold this device together are really recessed, so switching out the battery may require some long jewelers screwdrivers in order to take the two halves apart. Hopefully the battery lasts a long time!
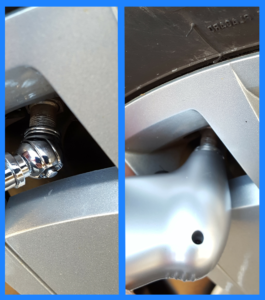
When I went to check the pressure on the car, I discovered a major shortcoming in that the device is pretty bulky and it was difficult to get the device on the valve without the hubcap getting in the way. The device is about 3cm wide so make sure you have plenty of room by the valve stem. You can see the difference in size with the image below – it was a bit too bulky (but not impossible) to fit on the stem with the hubcap on and nobody is going to remove the hubcap to check their tire pressure!
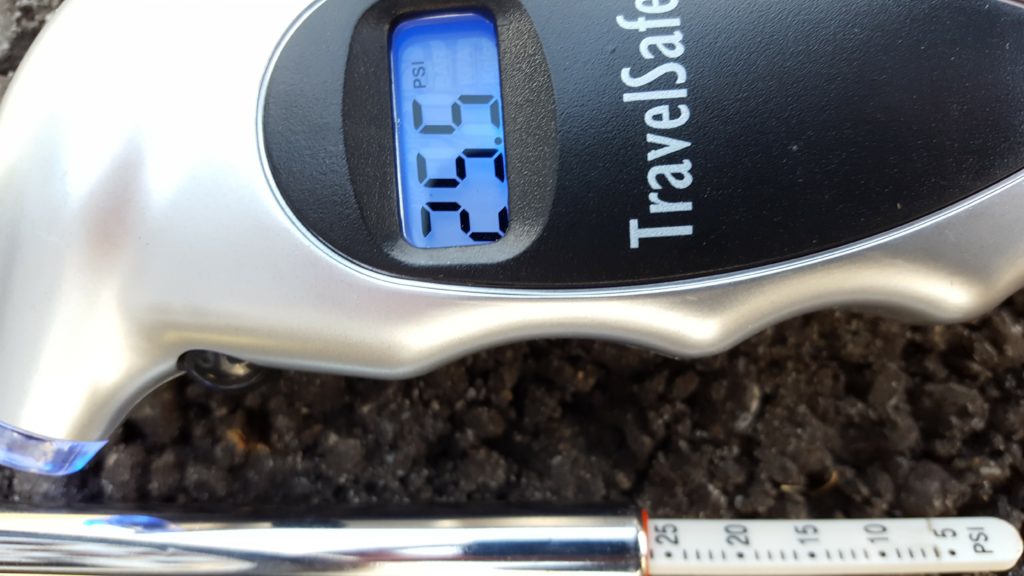
 The device however does seem to be accurate and was within 1 psi of my original manual device when I checked several tires so it’s reading is pretty consistent. The pressure is displayed for about 30 seconds so you get plenty of time to remove from the tire and then check the readings. The image below shows the reading of 25.5 on the device and about 26-26.5 on the manual device
The device 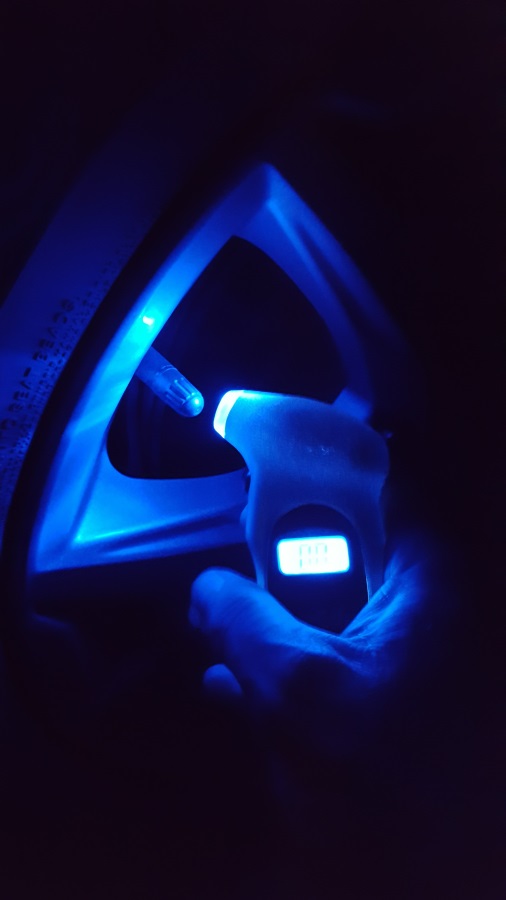 has a blue light that is always displayed whenever you take a reading. During the day you are not going to notice it. It is pretty handy to see at night when you are trying to check the pressure. The light is not strong enough to ruin your night vision or read the paper with, but is enough for you to be able to see where the dark valve stem is in the dark. The reading display is back lit to make the numbers more visible.
The device also shows you the pressure in psi, bar, kpa or kg/cm – the vast majority of you are going to use this on your car tires but the other pressure readings will be useful for air compressors too (I guess?). Switching between the scales is a simple push of the power button to cycle through the 4 stages.
This device works well if your hub caps allow plenty of access to your valve stems and it makes it a lot easier to read the pressure of your tires. The light also makes it easier to use at night, but it’s not bright enough to use as a flashlight to navigate around the car in the dark.
Note that I did receive this item with a promo code and this doesn’t affect my review of this product – it is a useful addition to the glovebox in the car, is easier to use than the manual device, but lacks some features that would make it the ideal tire pressure gauge for me. #TravelsaferDigitalTirePressureGauge